How to create checklist in Slack?
Checklists are ideal for tasks that have a set of steps that need to be followed and completed. To use checklists in Slack, you need to have Workast installed in your Slack workspace.
If this is your first time exploring Workast, we recommend starting with this article. It provides a guide on creating and managing checklists directly within the platform, offering valuable insights and tips to streamline your workflow effectively.
Ready to get started? Click here to install Workast, it's free!
To create a checklist
In a channel or direct message, type /checklist and press Enter. A message will be posted in the channel announcing that a new checklist has been created.
The message has an input where you can enter the items of the checklist. Click on it and add the desired item/s. Anyone in the channel can add items to the checklist as well.
Once an item has been completed, check the checkbox. Everyone will see the latest version of the checklist.
Name your checklist
You can create an unlimited number of checklists per channel. To keep them organized, you can name your checklist if you enter the name after the command like “/checklist Weekly Newsletter”
Bookmark a checklist
Keep the checklist accessible to your team by pinning the message of the checklist to the channel or creating a bookmark to the checklist message URL.
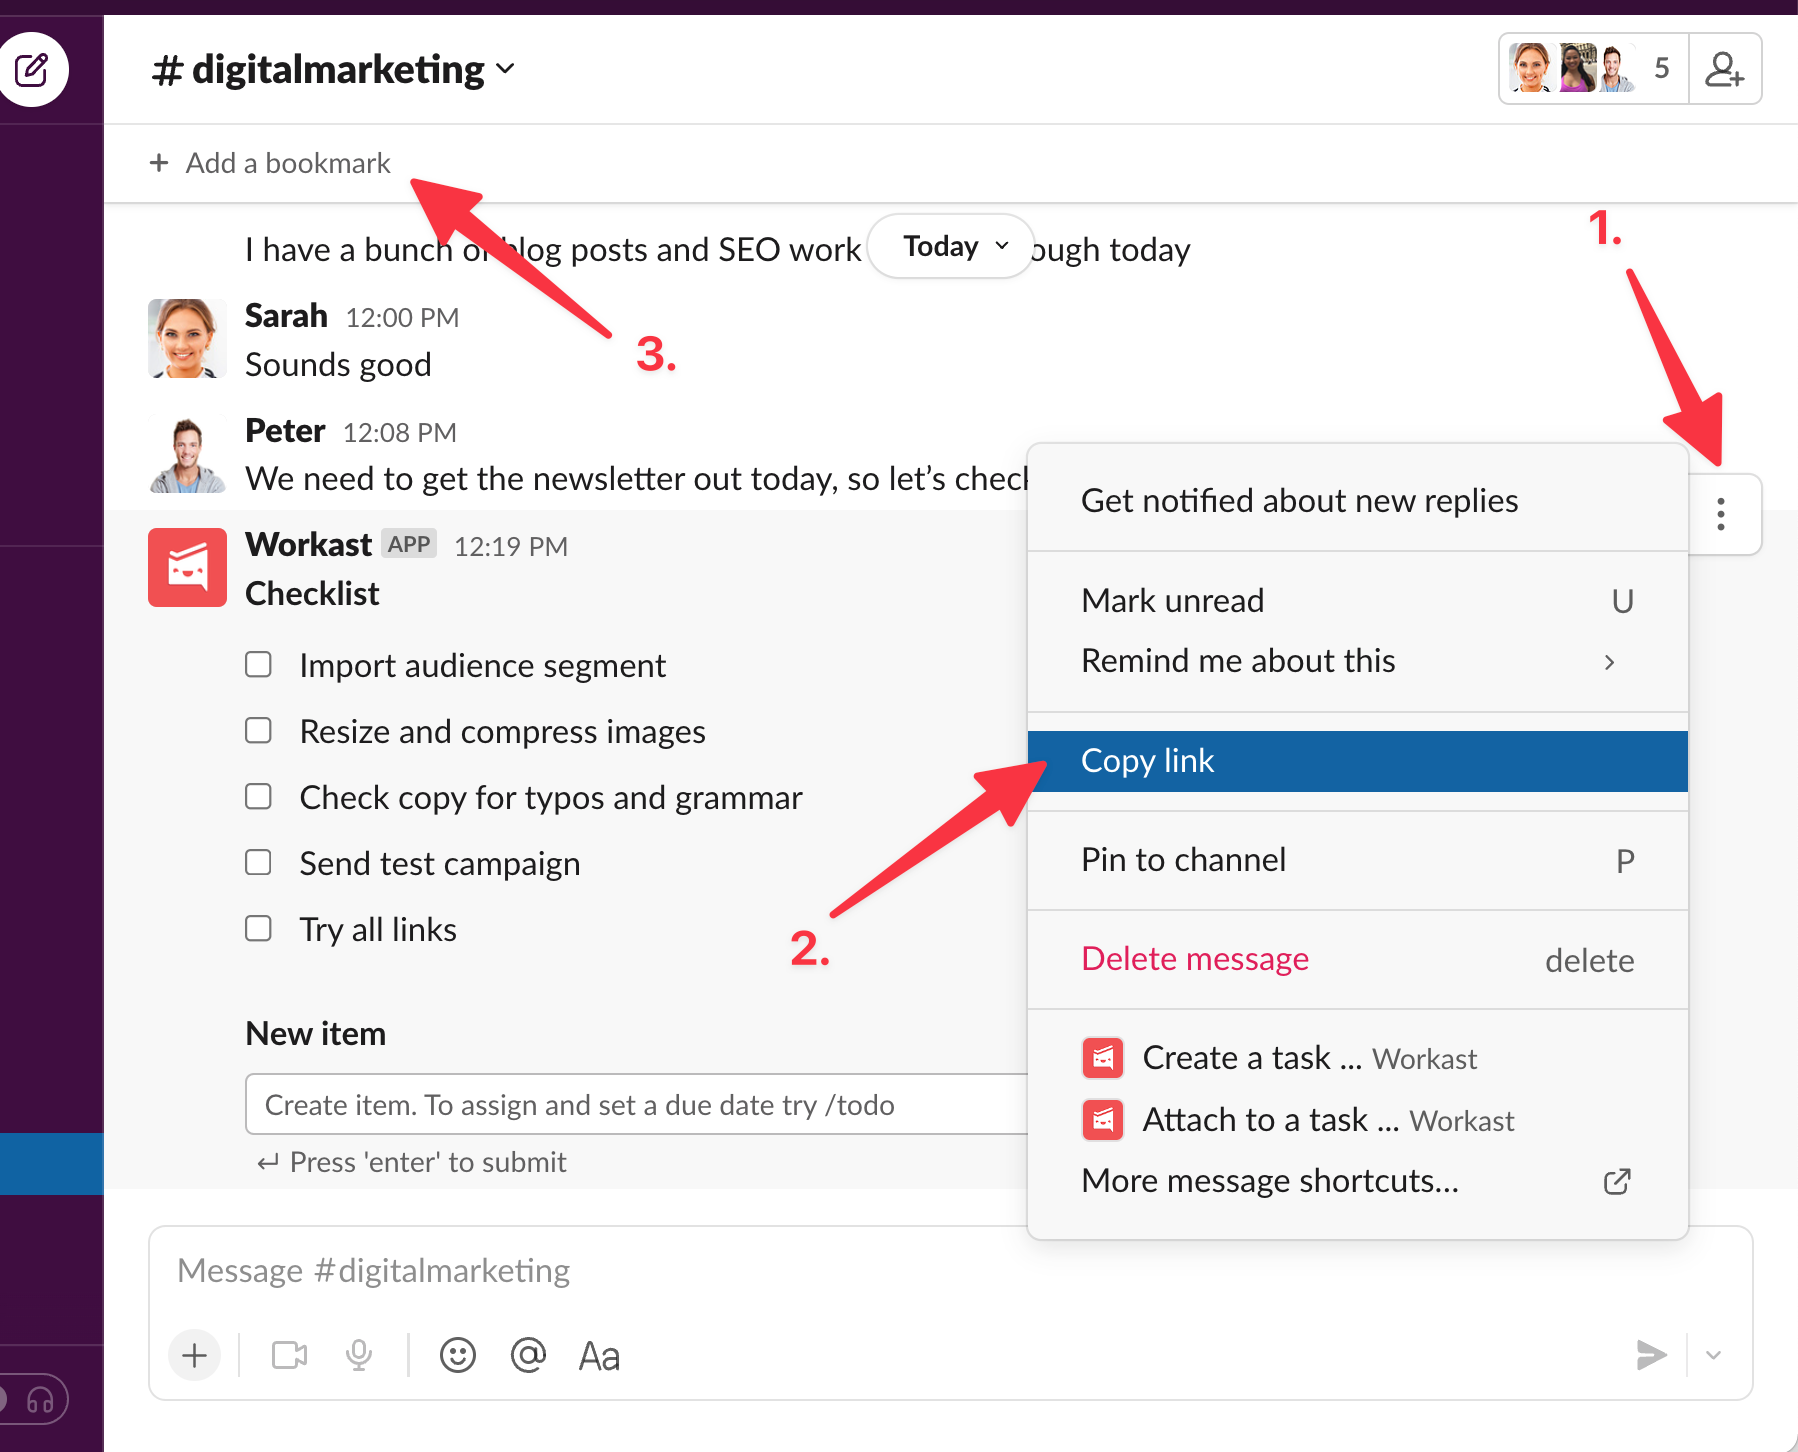
To create a bookmark to the checklist message URL.
Mouse over the checklist message.
Click the ellipses (three dots) and select "Copy link".
Click on "+add a bookmark" at the top of the channel and name it. When you click on that bookmark, you will be taken directly to the checklist.

Edit checklist
If you need to add items to your list or edit your checklist name or items, follow these steps:
Click on the "Edit" button at the top right of your checklist message.
To edit the checklist name or an item, click on it and make the desired changes.
To add an item, you can insert it at the top, between existing items, or at the bottom of the list. Remember, items must be part of a single list with no sublists or title separations.
To remove an item, delete the entire line of the item.
Click on "Save" once you are done.
Delete your checklist
Checklist work as a Slack message. The admin of the channel can delete it by following these steps:
Mouse over the Checklist message
Click on the "More actions" button (three dots),
Select "Delete message" from the dropdown menu.